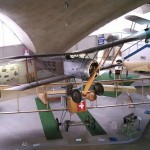
An afternoon with family. We heard about a museum build on the grounds of a former military airport, in Dubendorf. So, we went for a museum adventure.
Inside a vast hall of the museum, the airplanes are hung in the air. Perfect for 3D! So let’s shoot!


How we did it
The shooting
We didn’t plan to go shooting. We had only a smart phone with a 8MP camera. With a smart phone camera, the rotation between the pictures is greater then with a digital camera. It was quite a challenge to create wiggling photos with shutter of the screen on the smart phone.
Switch the grid on the camera display. The grid help you to reposition the camera for the right image after you shoot the left one.
Take at least 5 pictures from the same scene and make a tiny movement between the pictures.
Check for the background texture.
Avoid objects on the left and right side that will jump in and out in the picture while wiggling.
The adjusting
Rapidly adjust the alignment, then correct the rotation differences of all three axis, ∆z first, then ∆y, and the ∆x in the end.
Choose the export clipping to avoid object on the side that wiggles in an out of the scene.
And sharpness for a better 3D effect.
When to use it?
You don’t have to be a professional photographer to “bring the history back to life.” When you go on a holiday, you are sure to end up in a museum. Make the best of it.
Wiggling images are great for museums because you can adjust the images regardless of the restrictions the institutions have on photography. Whether you need to accentuate a single object or take a shot of a museum space, whether you want to produce a subtle effect or a stronger experience, wigglegrams are the right choice.
We suggest use of museum wigglegrams in all kinds of museums and cultural institutions.


